How to Make a Handprint Calendar
Hand print calendars are a simple but cherished gift from little ones. Here is some help for how to make a hand print calendar.
This year, I created what may be my most favorite parent gift – ever! I’ve been teaching for 10 years now so that is 10 years worth of Christmas gifts. I always try to come up with cute and memorable ideas for my students to make their parents.
Many years, we’ve made ornaments. My preschoolers have made puzzle piece wreath ornaments and Christmas tree noodle ornaments and popsicle stick tree ornaments. When I taught third and fourth grade, we painted canvases and made glass ball ornaments. Still, of all the gifts we’ve made parents – this one has been my favorite. This year, we made a hand print calendar.
This post may contain affiliate links. As an Amazon Associate, I earn from qualifying purchases. You can read more in my disclosure policy.

I have long been in love with hand print calendars! I was so glad we finally made them. I put my own spin on it and learned a lot in the process. I thought I’d share my ideas (and experiences) so all the other preschool teachers – and parents – can easily create this priceless gift and keepsake.
The thing I love about this project is that teachers can create this with their class as a beautiful gift for parents or parents can create a calendar with their own child as a gift for grandparents.
Calendar Supplies Needed:
- White cardstock
- Washable tempera paint (I like this paint best.)
- 3/4 inch binding rings
How to Make a Hand Print Calendar:
- Copy a calendar onto white cardstock.
- Choose what pictures you are going to stamp for each month.
- Paint hands and stamp pictures on the calendar.
- Repeat for all twelve months.
- Let pages dry and bind the calendars together.
More Details and Helpful Advice:
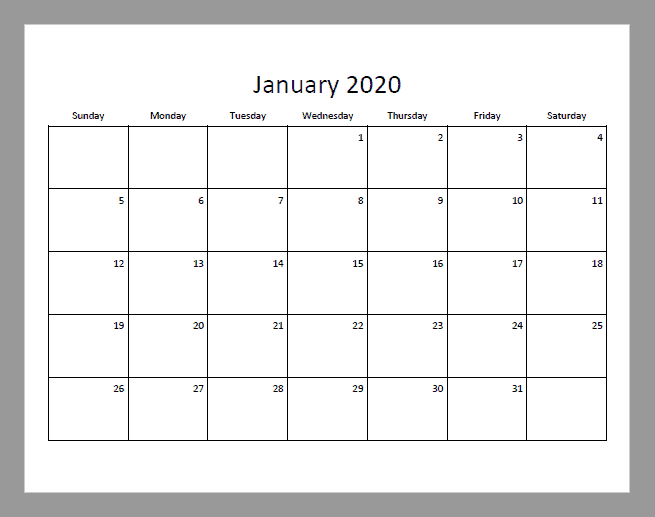
The printable calendars I used to create this project are no longer available. I wanted a clean and simple calendar, with a bit of extra room at the top, so the calendar is centered evenly after it is bound together. After a lot of useless searching, I finally created my own calendars. If you would like a copy, I have bundled the calendars I created for 2023 and 2024 together in a printable pdf pack for $4. It is available for instant download upon purchasing here.
Here is an example of the calendars I created. Simple. No urls on the bottom. No ads. Centered evenly with a bit of extra space on top for binding. Prints in black and white so you are not wasting ink. You can find many free printable calendars available online, but I wanted to bundle these calendars together for those who don’t want to spend the time searching for a suitable calendar. These calendars are in pdf format and ready to print. The calendars are yours instantly upon payment.
The calendar pack also includes a simple cover page (From My Hands to Yours) without a date so it can be used at any time. I included a printable page of directions to help make the creating process as simple as I can.
Click here to buy the Hand Print Calendar pack.
If you are planning to make a hand print calendar, please take my advice and start well ahead of time! If you are doing this at school, start sometime in early November. If you are doing it at home, still give yourself plenty of time to get all the pages stamped. This project will take several days to create.
The main trick with this calendar is to make sure you are stamping on the back of the correct month. This is VERY important!
To help you out, here is a cheat sheet. The front cover has January’s picture on the back. January’s calendar has February’s picture, February has March’s picture, March has April’s picture, April has May’s picture, May has June’s picture, June has July’s picture, July has August’s picture, August has September’s picture, September has October’s picture, October has November’s picture, and November has December’s picture. You’re working a month ahead but it helped me to write it out like this.
I also wrote what picture was getting stamped on each page and the colors I needed to help myself stay organized.
Do make sure that you flip the page correctly before you stamp hands so the picture is not upside down! Look at the calendar page quickly and pretend you are turning the page before you put painted hands down.
To keep the papers organized, after I stamped a child’s hands, I wrote their name on a mini post-it note and stuck it on the page. When the pictures were dry, I stored them in my file cabinet. I had a file for each child which kept everything organized until we were done with all the months of the year.
If you don’t have access to a binding machine (which I’m amazed aren’t more expensive then they are), take your finished calendar to Office Depot to have them bind it for you.
Hand Print Calendar Picture Ideas:
Now comes the fun part – painting preschool hands! I looked at so many different ideas but chose the ones that appealed most to me. You can do the same! I had two requirements for the pictures we created.
- I wanted them to be simple enough that the parents would recognize them.
- I wanted them to all be made with their hands or fingers. We drew on very few extra touches, as you will see below.
Feel free to adapt as you like, but here are the hand print picture ideas I used for our preschool calendars.
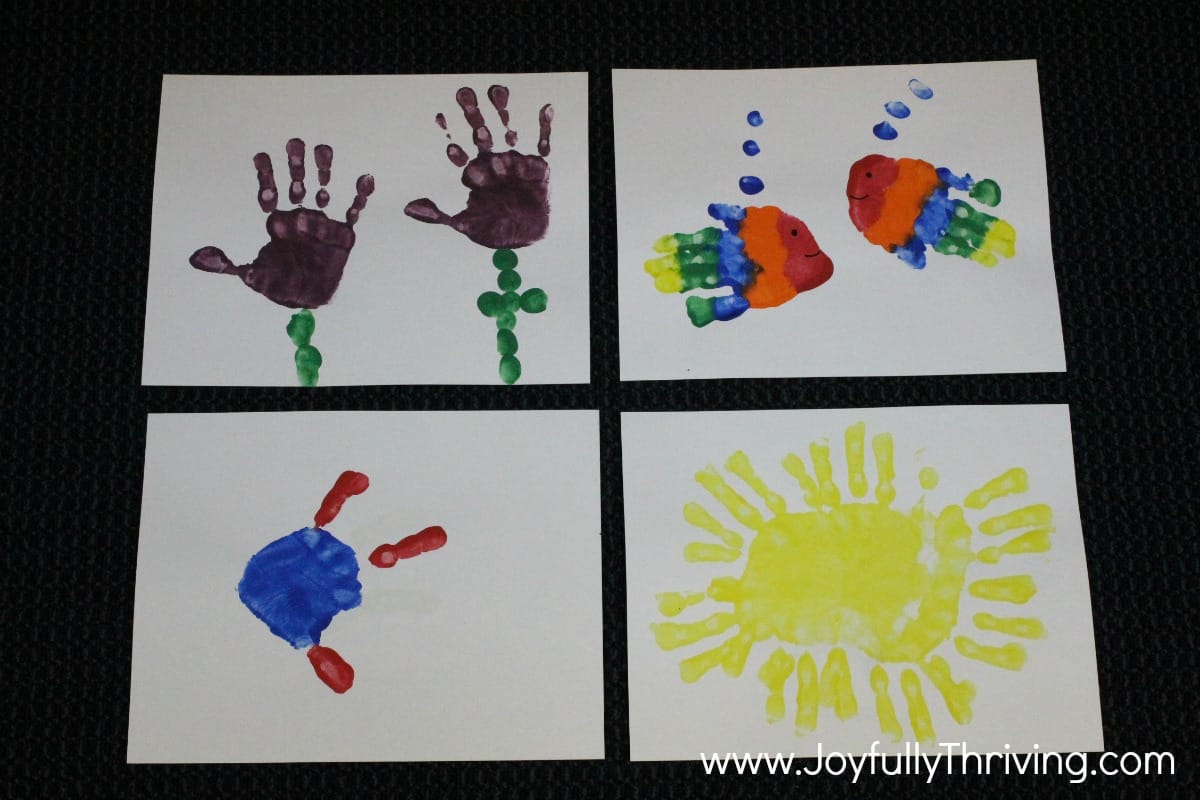
For January, we made a blue snowflake. I just used the fingers. On some, I painted the palm and some I didn’t. Both of the snowflakes turned out cute. February was a classic and simple red heart.
For March, we painted a green shamrock. I only painted the fingers for the shamrock and we used the thumb to draw our stem. April was a bit more complicated for the April showers. We used our hands to paint the top part of the umbrella. We used a thumb to draw the brown handle and fingers to add the blue raindrops.

April showers bring May flowers so we mixed paint and painted two flowers for May. June was a rainbow fish. This one was a bit more complicated but the kids loved watching me paint the stripes.
July was a flag. The white was a bit hard to see, but you get the point. We also added silver and gold stars to the blue when the paint dried. August was a bright sunshine.
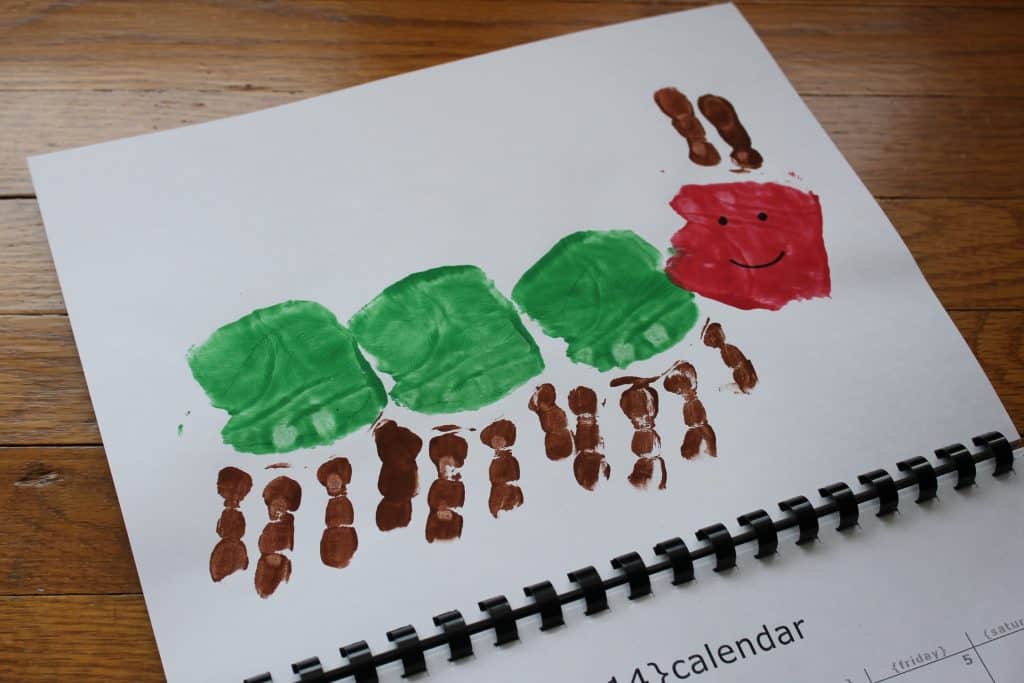
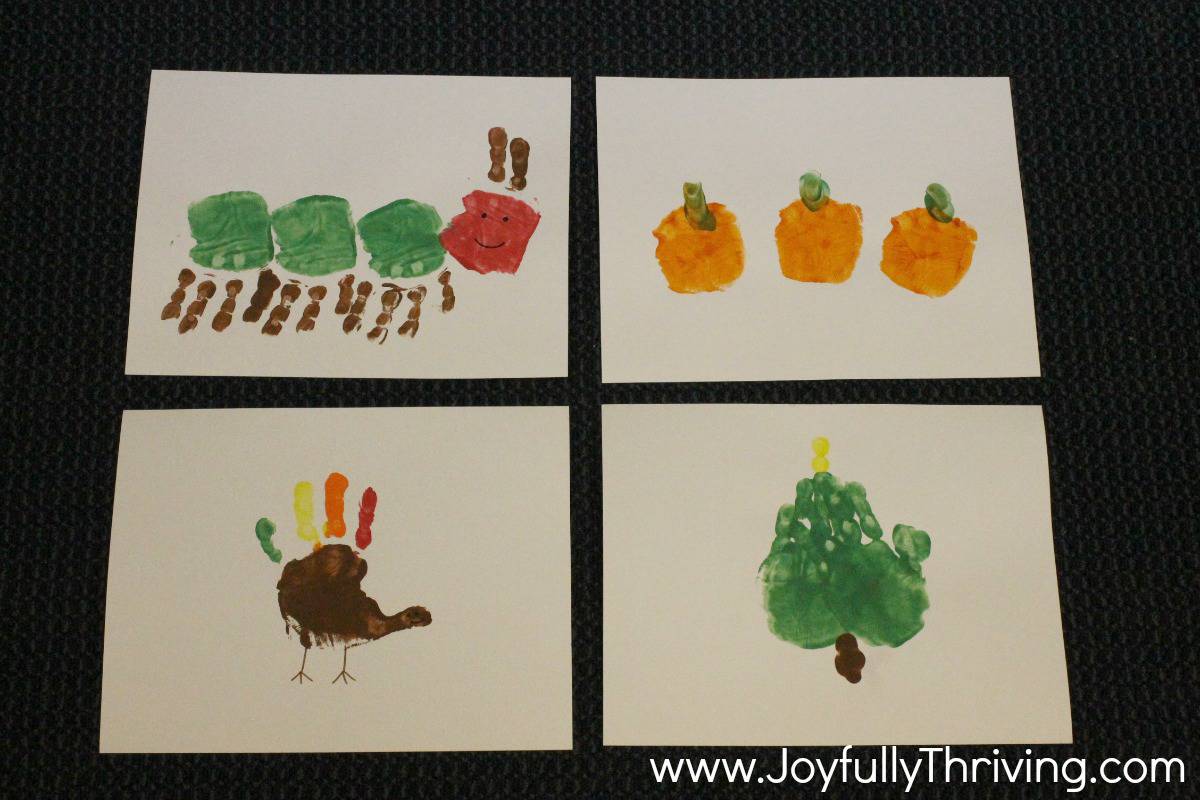
To finish out the year, here is what we stamped. My favorite month of all was September. Since school starts in September, we made the Very Hungry Caterpillar. I started by painting one palm red with the two middle fingers brown. After we stamped that, I flipped the calendar around and painted the other palm green with all fingers brown for the body and legs. I found that flipping the calendar around made the children less confused about what direction we were stamping. Then, they used a brown finger to draw a face. Isn’t he cute?
For October, we stamped pumpkins using our palm. The green stems we added with our thumbs. November was the classic hand print turkey.
Finally, December ended with a Christmas tree. We were going to make a wreath but I quickly realized our hands were too big already to fit an entire wreath on the page! I actually like the Christmas tree better so it was a good switch. We used one green hand to make the tree, and used our brown thumb to add the stem and a yellow fingerprint dot for the star.
There you have it! Those are our adorable hand print calendars. It is a priceless keepsake project that takes time but not a lot of expense.
I hope your preschoolers – and their parents – will love this gift just as much we we did!
Have you ever done a hand print calendar? What pictures did you use? If you have any questions, feel free to ask in the comments and I’ll be happy to help!
Note: If you want to buy the printable calendar pack, the calendar pack is available for instant download in my Etsy shop for $4. Buy them here. All calendars are in pdf format and are formatted especially for this hand print calendar project!


I’m making this year with my class. 2023-2024. What month should I start with? Should I start with January 2024-Dec 2024?
Yay! Such a great class gift! If you are planning on making it as a Christmas gift, then yes, I would start with January. But, that is the beauty of this calendar! You can really start whenever you want to! 🙂 Happy calendar creating!
How do you get the binder thing on?
I used a binding machine that our school had. You could also take it to any office store (like Office Max) and have them bind it for you.
hi
i love your handprint calendar idea did you bind the pages yourself or did you send it somewhere to have it done
Hi, Sharron! I’m glad you love the idea! Our school actually had a binding machine, so I bound them myself. It’s very simple if you have access to that punching machine. If not, I’d recommend checking out Staples or Office Depot, and pricing out the binding there.
How cute the calendar is, Kristen. I’m sure the parents loved it. It would be a keeper for me.
We’ve loved having a calendar to note things about Lena’s first year. How fun to keep it going!
Good idea, Bethany! I’m sure Lena’s grandparents would love receiving a calendar like this in the years to come!
What a great idea! That will be a precious keepsake for those parents.
Thank you, Kati! The kids really enjoyed making them – and the parents loved receiving them!